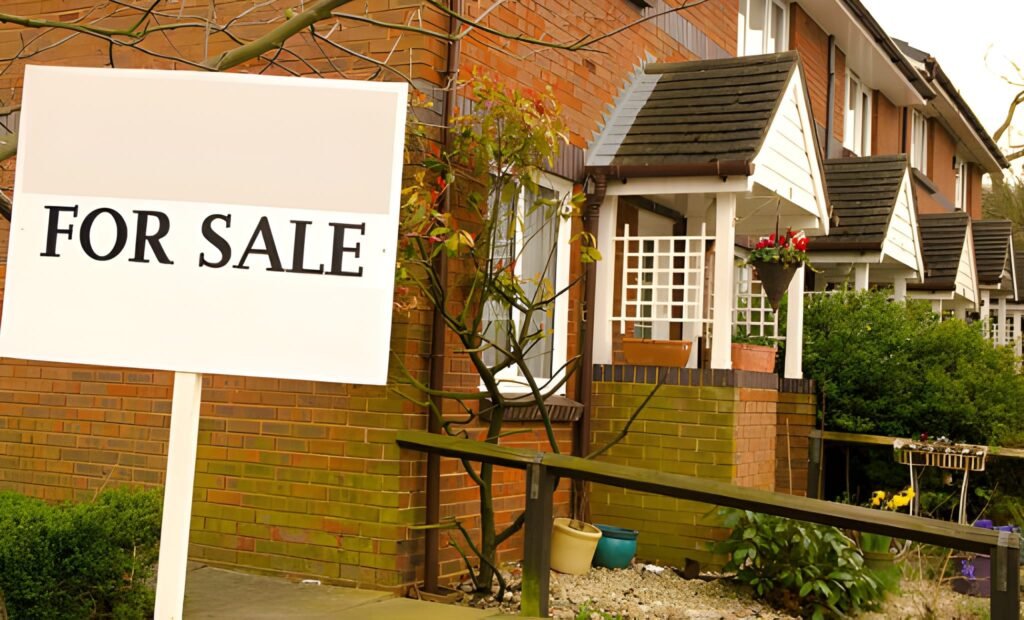
Choosing to sell your home without an estate agent, known as a private sale, is a significant undertaking. It replaces agent fees with personal investment—of time, effort, and meticulous attention to detail. This path is not for the faint-hearted, but for the organised, motivated, and financially savvy homeowner, it can be a profoundly rewarding process that puts you in complete control and saves a considerable sum. This guide breaks down the journey into 39 essential steps, providing a structured framework for a successful sale.
Phase 1: Foundation & Preparation (Steps 1-12)
The success of a private sale is determined before the property is even listed. This phase is about building a solid foundation.
- Conduct a Motive Audit: Be brutally honest with yourself. Are you selling to save money? Do you have the time to manage viewings and negotiations? Your motivation will fuel the process.
- Research the Market: Immerse yourself in Rightmove and Zoopla. Analyse sold prices (via the Land Registry) for your street and area, not just asking prices. Understand the realistic value of your home.
- Calculate the Financial Imperative: Determine your agent fee saving. If your home is worth £400,000 and a local agent charges 1.2% + VAT, your saving is £400,000 \times (0.012 \times 1.2) = £5,760. This is your target saving.
- Secure an EPC: By law, you must have a valid Energy Performance Certificate to market your property. Book an accredited domestic energy assessor; costs typically range from £60-£120.
- Gather Documentation: Locate your title deeds (if you have them), any planning permissions for work done, building regulations certificates, and guarantees for windows, damp-proof courses, or roofs.
- Prepare a Sales Pack: Compile these documents digitally. Transparency builds buyer confidence.
- Execute a Pre-Sale Deep Clean: Clean every surface, inside and out. This is non-negotiable.
- Address Minor Repairs: Fix dripping taps, cracked sealant, sticking doors, and blown lightbulbs. These small items signal poor maintenance to buyers.
- Consider a Professional Valuation: For a few hundred pounds, a RICS surveyor can provide an impartial valuation to justify your asking price to yourself and potential buyers.
- Define Your USP: What is your property’s unique selling proposition? Is it the garden, the light, the location, the school catchment? This will form the core of your marketing.
- Set a Realistic Price: Based on your research and any professional advice, set a competitive asking price. Overpricing is the fastest way to stall a private sale.
- Plan for Viewings: Decide on viewing windows. How will you accommodate requests? Who will conduct them? Prepare your family or housemates.
Phase 2: Marketing & Exposure (Steps 13-23)
Without an agent’s marketing machine, you must become the curator of your property’s image.
- Write Compelling Copy: Draft the property description. Be descriptive but honest. Highlight the USP, room dimensions, and key features. Avoid clichés like “deceptively spacious.”
- Photograph Like a Pro: Hire a professional property photographer. This is not the place to cut corners. Budget £150-£300 for high-quality, wide-angle, well-lit images.
- Create a Floorplan: Again, hire a professional or use a reputable app. A floorplan is essential for helping buyers visualise space. Cost: £80-£150.
- Choose Your Portal: Select a online listing service. Housesimple, Strike, and The Modern House offer paid or free packages to list on Rightmove and Zoopla, the UK’s two dominant portals.
- Craft the Listing: Upload your photos, plan, and description to your chosen portal. Ensure all details are accurate.
- Leverage Social Media: Share the listing on local Facebook groups, Twitter, Instagram, and LinkedIn. Word-of-mouth is powerful.
- Utilise Offline Channels: Make use of the “For Sale” board provided by your listing service.
- Prepare a Viewing Protocol: Have a system for booking viewings (a dedicated email address or calendar link works well).
- Stage Your Home: Declutter absolutely everything. Depersonalise by removing family photos. Arrange furniture to maximise space and light.
- Create an Information Sheet: A printed A4 sheet with key facts: room dimensions, boiler age, council tax band, EPC rating. Leave it out for viewers.
- Rehearse the Viewing: Practice showing someone around your home. What is the logical flow? What are the key points to mention in each room?
Phase 3: Conducting Viewings & Negotiation (Steps 24-32)
You are now the sales agent. Your demeanour and professionalism are critical.
- Be Flexible and Responsive: Respond to enquiry emails quickly and be as accommodating as possible with viewing times.
- Master the Viewing: Greet buyers warmly. Show them around at their pace, letting them experience the space. Point out features but don’t oversell. Listen more than you talk.
- Answer Questions Honestly: If there is a known issue, be upfront. Dishonesty will kill the deal later and could have legal consequences.
- Gather Feedback: After each viewing, politely ask for feedback. This is invaluable data that can help you adjust your strategy or price.
- Manage Offers: When an offer comes in, acknowledge it formally. Do not feel pressured to accept or decline immediately.
- Qualify the Buyer: This is crucial. Ask if they are chain-free, have a mortgage Agreement in Principle, or are a cash buyer. A lower offer from a proceedable buyer is better than a higher offer from someone in a long chain.
- Negotiate Strategically: Negotiate on price, but also on timing. If they want a reduction, can they agree to a quicker exchange?
- Formally Accept an Offer: Once agreed, confirm the offer in writing via email. State the agreed price and that the property is now “sold subject to contract.”
- Pause Marketing: Inform your portal provider to mark the listing as “Sold Subject to Contract” (SSTC) to manage expectations of other enquirers.
Phase 4: Conveyancing & The Legal Process (Steps 33-39)
The hardest part begins. Your solicitor becomes your most important partner.
- Instruct a Solicitor/Conveyancer: If you haven’t already, do this immediately. Choose one with good reviews. Provide them with the buyer’s details.
- Complete Law Society Forms: Your solicitor will send you detailed forms (TA6, TA7, TA10) on the property’s boundaries, guarantees, and other details. Complete these with painstaking accuracy.
- Manage Buyer Enquiries: The buyer’s solicitor will raise enquiries. Your solicitor will liaise with you to provide answers promptly. Delays here are the biggest cause of fall-throughs.
- Liaise Constantly: Maintain regular communication with your buyer and your solicitor. A quick, friendly email to the buyer each week can prevent anxiety and keep the deal on track.
- Coordinate the Chain: If you are in a chain, you may need to gently chase the progress of other related sales. This requires diplomacy.
- Agree on a Completion Date: Once all enquiries are satisfied and mortgages are offered, you, the buyer, and both solicitors will agree on a completion date.
- Exchange and Complete: Your solicitor will handle the exchange of contracts (which becomes legally binding) and the completion day, when keys are handed over and funds are transferred.
This 39-step protocol is a marathon, not a sprint. It demands organisation, patience, and a willingness to learn. The financial reward, however, is direct and substantial. By taking control, you ensure that every aspect of the sale is managed with the care and attention that only an owner can provide.